Swimming Pool Landscaping: Building a Garden Paradise with Steel Edging | Case Study
Introduction
This is a case study article about a swimming pool landscaping project that “transformed a tired & aging pool area into a beautiful backyard oasis”. The pool area in question is located in Emerald Beach, Coffs Harbour. It belongs to Tarrant (and his partner Caryn) who agreed to share their experience using Straightcurve weathering steel products as part of their pool renovation project.
On a video call, Tarrant and I discussed various swimming pool landscaping topics including what led him to renovate his pool area. Why he decided to use Straightcurve weathering steel raised garden bed panels. And what it’s been like living with the products and the space they helped create over the last three years.
Tarrant shared before & after photos and talked through the changes he made to improve the usability of the pool space, enhance the aesthetics of the whole garden, and reduce his ongoing maintenance.
This article is for anyone looking for swimming pool landscaping ideas, whether you’re renovating an established pool area (like Tarrant did) or starting from scratch. This interview-style case study is intended to inspire and answer questions about the suitability and benefits of using Steel Garden Edging in your pool area.
Read this article if you’d like to know:
- How weathering steel landscaping products can enhance your pool area.
- How suitable weathering steel is for use in pool & spa wet areas.
- How to prepare and extend the life of weathering steel landscaping panels.
- How weathering steel compares to other pool landscaping or retaining options.
- The benefits of using steel garden edging for swimming pool landscaping.
- What it’s like to live with weathering steel raised garden beds and planters.
Swimming Pool Landscaping – Straightcurve Steel Raised Garden Beds
Thanks for agreeing to talk about your swimming pool landscaping project Tarrant. Could you explain why you wanted to renovate your backyard pool area?
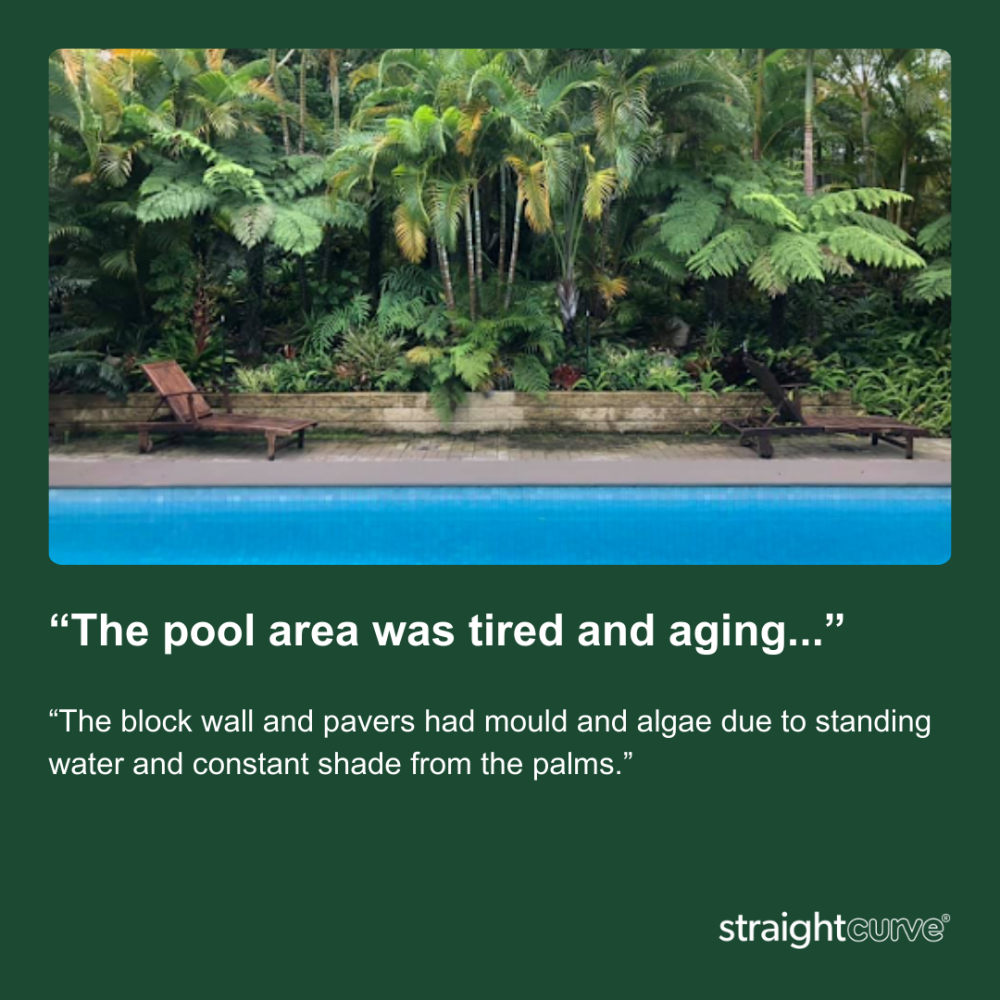
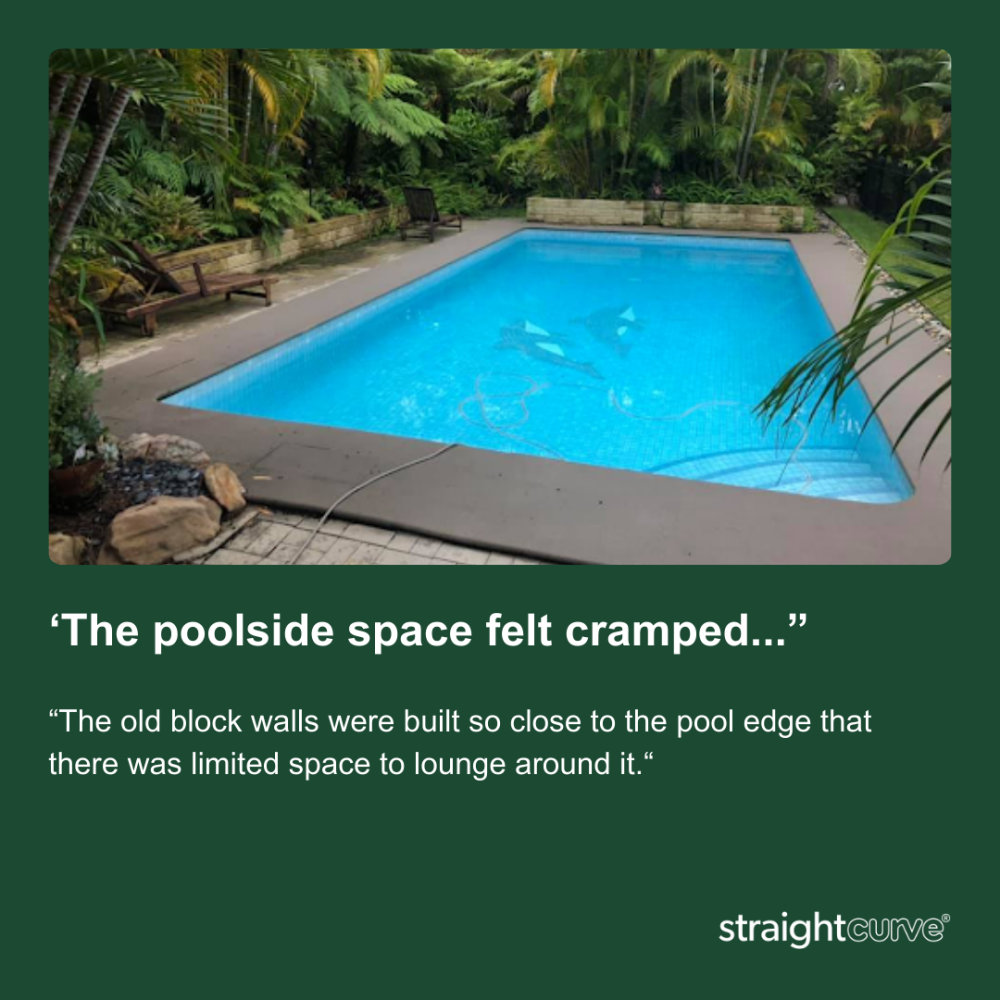
“Yep, all good. So for context, I’ll share some pictures of what our pool area used to look like. In this first picture, you’re looking at the backyard pool area of our home in Emerald Beach, Coffs Harbour, as it looked just over 3 years ago. It’s a 10m x 5m pool that was installed by the previous owners about 15 years before this picture was taken. As you can see, the planting was mature, and being very close to the pool it threw constant shade over the block wall and pool pavers. That led to them developing the mould and algae you see in the pics. Plus the roots of the palms were lifting the pool pavers and coping. That’s why we wanted to give the area a bit of an upgrade.”
Swimming Pool Landscaping – Before Renovation with Straightcurve
What was your plan for this swimming pool landscaping project and what did you want to achieve?
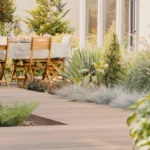
“I planned to replace the block wall and pool pavers with more modern and less porous alternatives that would be less likely to develop mould. I also wanted to open up the poolside space a bit more by pushing back the front face of the raised garden beds. I wanted to introduce extra drainage to deal with pool and rainwater runoff. Overall I wanted to give the whole place a more modern look and spacious feel. Plus, I wanted to reduce the amount of back-breaking maintenance – scrubbing moss & mould is no fun!”
Swimming Pool Landscaping – Before Renovation with Straightcurve
Which products did you choose for the uplift and why did you choose them?
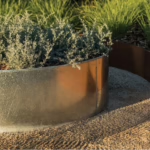
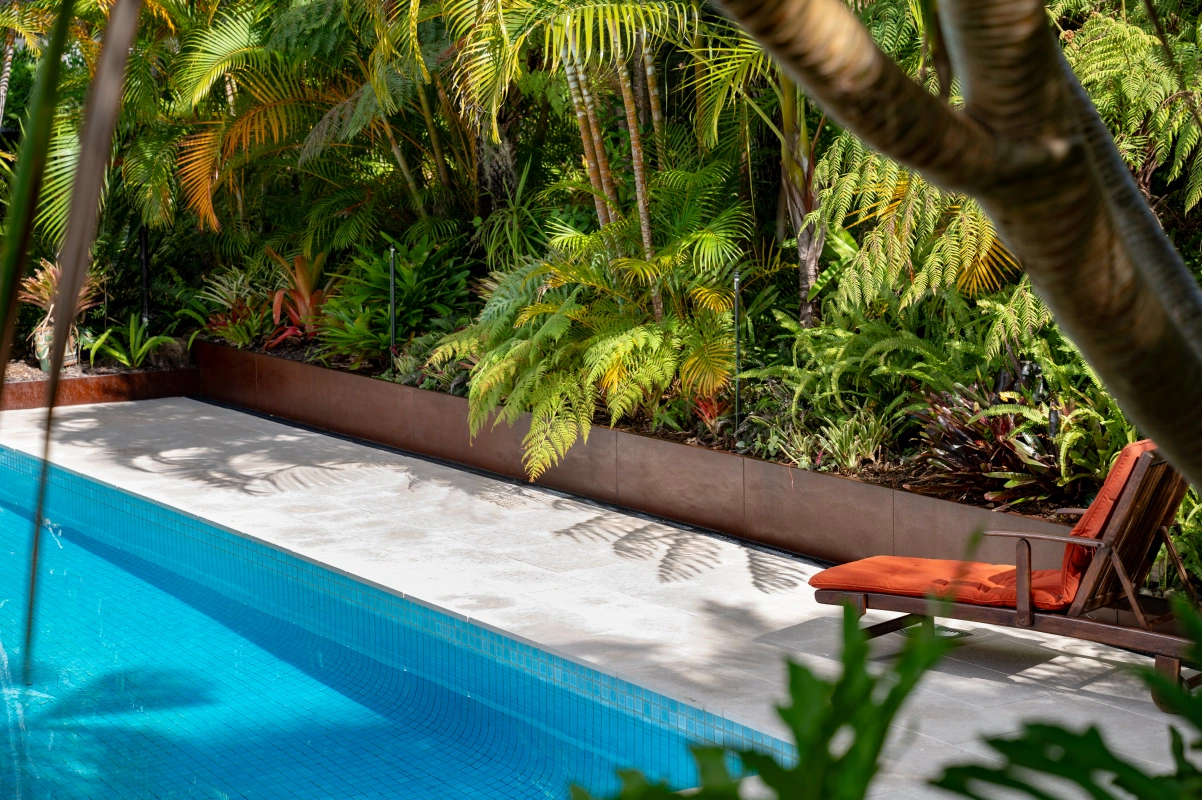
“I replaced the old porous pool pavers with better quality sealed limestone pavers because they look much nicer and they’re mould resistant. I replaced the old-fashioned Besser block wall with mixed-height modular weathering steel panels by Straightcurve because I loved the colour, texture, and contemporary look. The steel panels also take up much less depth than the old blocks adding extra space between the pool edge and the front face of the beds. I also added drainage channels between the garden beds and pavers to stop water from pooling.”
Swimming Pool Landscaping – Straightcurve Steel Raised Garden Beds
OK, so how did you get the job done – was this a DIY project, or did you get help from a professional swimming pool landscaping company?
“In my case, it was a bit of both. A close friend who runs his landscaping company offered to help me with labour, earth-moving equipment, and the materials I needed to complete the job. So the main job of removing the old materials, clearing, and re-establishing the levels was a combined effort that took around 2 weeks to complete (thanks to some awful weather). Then I installed most of the Straightcurve edging over subsequent weekends and whenever I had a moment spare.”
What was the swimming pool landscaping process like and what did you learn from helping to install the product?
“Well, it was a lot of work because we completely stripped the site before the contractors turned up. I had removed all the paving and all the old retaining wall blocks so the landscapers could get straight onto the earthworks. I learned that using Straightcurve is more satisfying than working with Besser blocks. Each block is only maybe 5-10 kilos but when you have to carry 300 of them it adds up. If I had been laying them rather than removing them, it would have been even slower going. By comparison, when we walked in the steel panels and installed them, the new raised garden bed walls took shape so quickly. Straightcurve is promoted as a landscaping range that’s quick and easy to install – and that was very evident on site.”
What advice or hints & tips would you give to someone looking to tackle a similar swimming pool landscaping project using steel garden edging products?
“I’d say the first thing is to get clear on the look you want to create.”
“As in, do you want a symmetrical design or something with flowing curves? For us, because it was a rectangle pool, it made sense to use straight lines for the bulk of it. But we also added a few sections of curved panels, to break up the uniformity a bit.”
“Work out your heights.”
“We choose to use different panel heights because of the fall of the land. We used 240mm high panels at each end of the length of the pool and 560mm in the middle. So think about what heights you’re working with and figure out whether it makes sense to change the profile heights of your bed as well.”
“Think about drainage, not only for your garden but for the pool area itself.”
“We’ve had some very wet winters in the last few years and we used to get a lot of pooling water – which caused the problems you can see in the ‘before’ pics. We added extra drainage between the pavers and steel garden beds to channel away any pool water splash or rainwater runoff.”
“Get your levels right before installing.”
“We used string lines to keep everything straight and got our levels right before we installed anything. The Straightcurve panels fix directly to the ground so it’s tempting to jump in and start connecting and installing the panels straight away. But make sure your levels are good first. It might take a bit of time and effort, but it’s always worth it in the long run.”
“I decided to ‘pre-weather’ the panels before installation to avoid patina bleed.”
“Our new pool pavers were a very light, coffee-colored stone, so I had the Straightcurve panels pre-weathering for a good six weeks outside before I installed them. To do that I washed the panels down with a detergent to pull the factory oil off them. Then I hit them with a misting hose twice a day for six weeks to kickstart the patina development before installation. Because of that, there was no bleed-off onto the pavers whatsoever. I always had the panels standing on their end so no water sat on them. That way, even when it was dewy overnight or rained, no water was left to sit and pool on the panels.”
“I also coated the inside of the panels with bitumen paint to extend the life of the product.”
“It’s not essential, but I decided to take this extra step to extend the lifespan of the product. I coated the inside faces of each panel with bitumen paint from Bunnings. This optional step created an extra protective barrier between the steel and the soil and moisture. For me, this pool reno was a pretty big project, so I thought, let’s do a little bit of extra work at the front end. It felt good to know I’d done everything possible to prolong the longevity of the product.”
“I sealed the waterside faces of the steel panels with Penetrol.”
“Once the panels had formed an even patina and I was happy with the colour (about two months after installation in our case) I used Penetrol to seal the external faces. It’s a liquid product that’s quick and easy to paint onto steel surfaces with a paintbrush. I did that for two reasons. Firstly, to add an extra layer of protection from the pool water that gets splashed everywhere when kids are playing in the pool. And secondly, sealing the panels like this holds the colour. Without sealing it, the steel panels gradually become darker over time. To keep the weathering steel colour fixed and stable I reapply Penetrol twice a year. You don’t have to do it, but for me, it’s a small maintenance job that’s much easier than scrubbing mould and algae.”
Swimming Pool Landscaping – Straightcurve Steel Raised Garden Beds
The place looks so much nicer since the upgrade. Having lived with this for 3 years what do you like most about it?
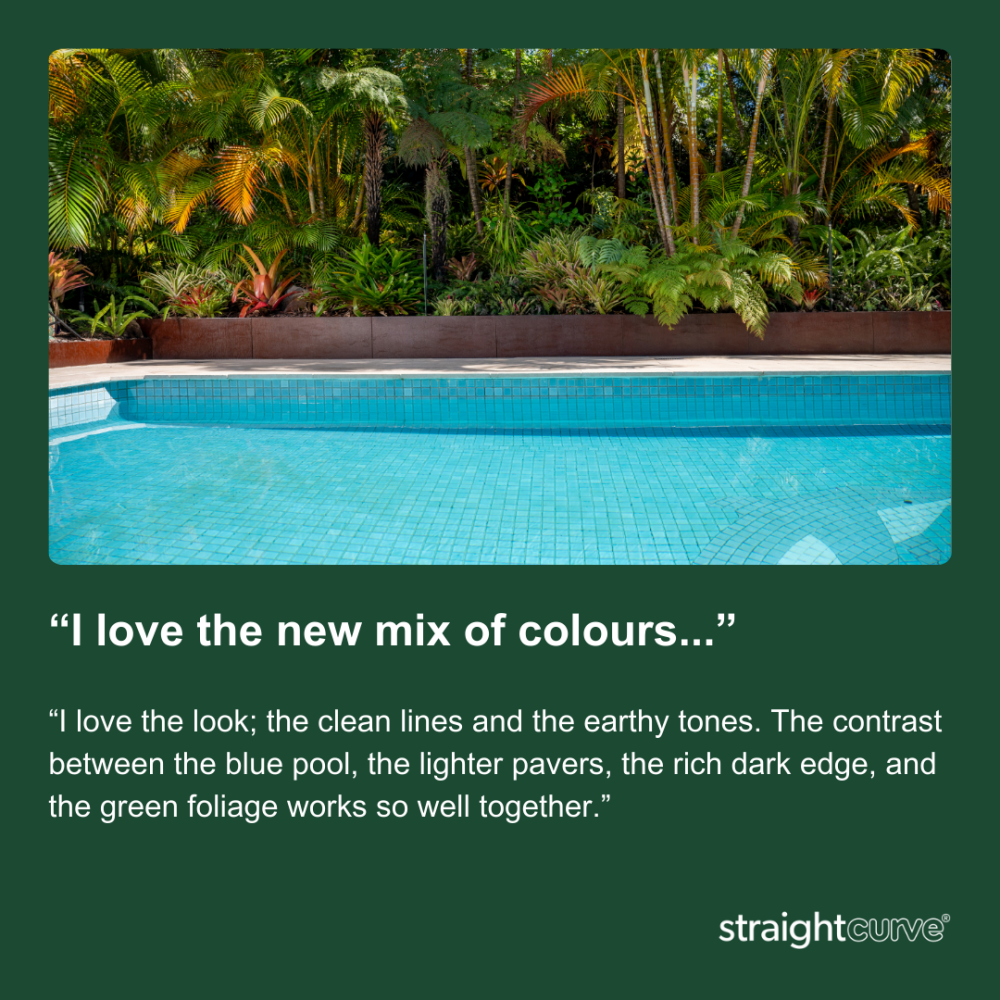
“I love the look; the clean lines and the earthy tones. And I love the contrasts between the blue pool, the light-coloured pavers, the rich dark edge, and the green foliage. It all works so well together. When you look at the ‘before’ images, it was almost a grayish paver. And then what started as a lightish Besser block wasn’t lightish at the end of it. It just looked dirty. Now, even three years on, everything still looks so clean and each feature seems to accentuate the other. I also really appreciate that years later everything is still perfectly straight. There’s been no movement whatsoever.”
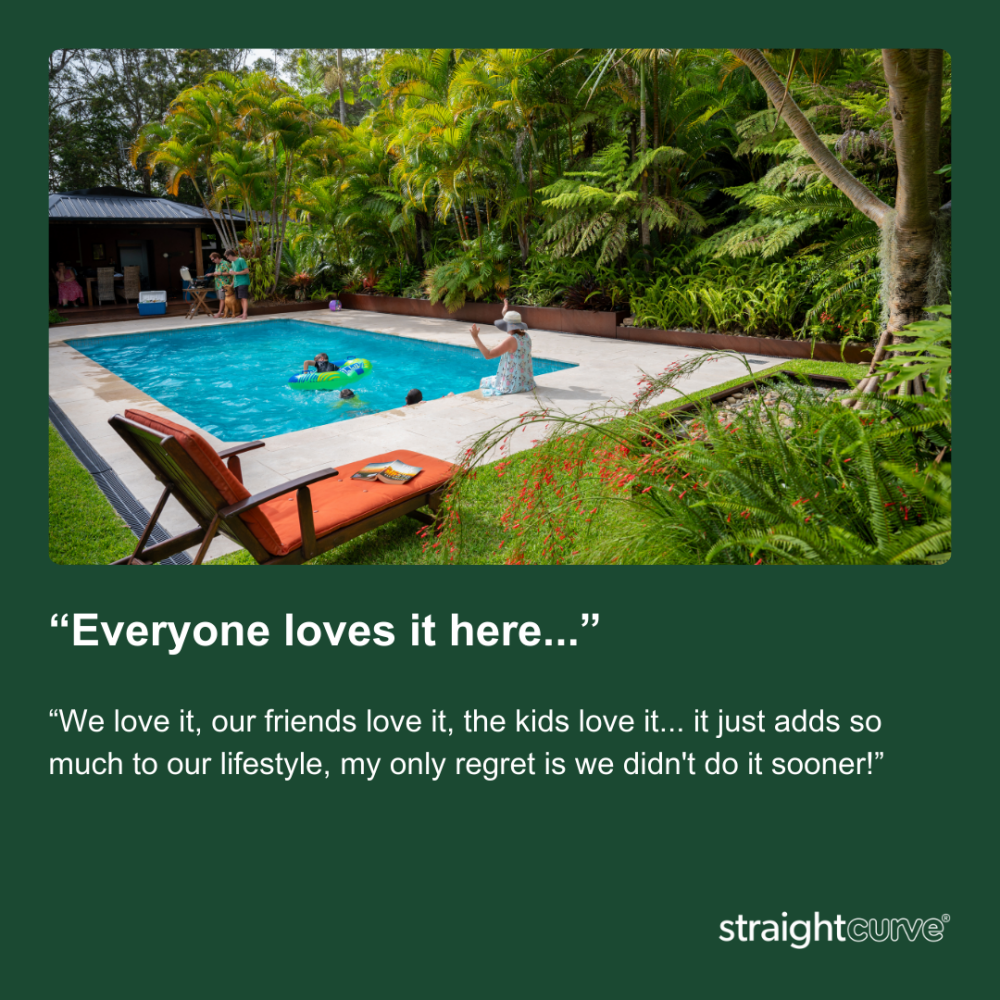
What are the main benefits you’ve enjoyed since completing the project?
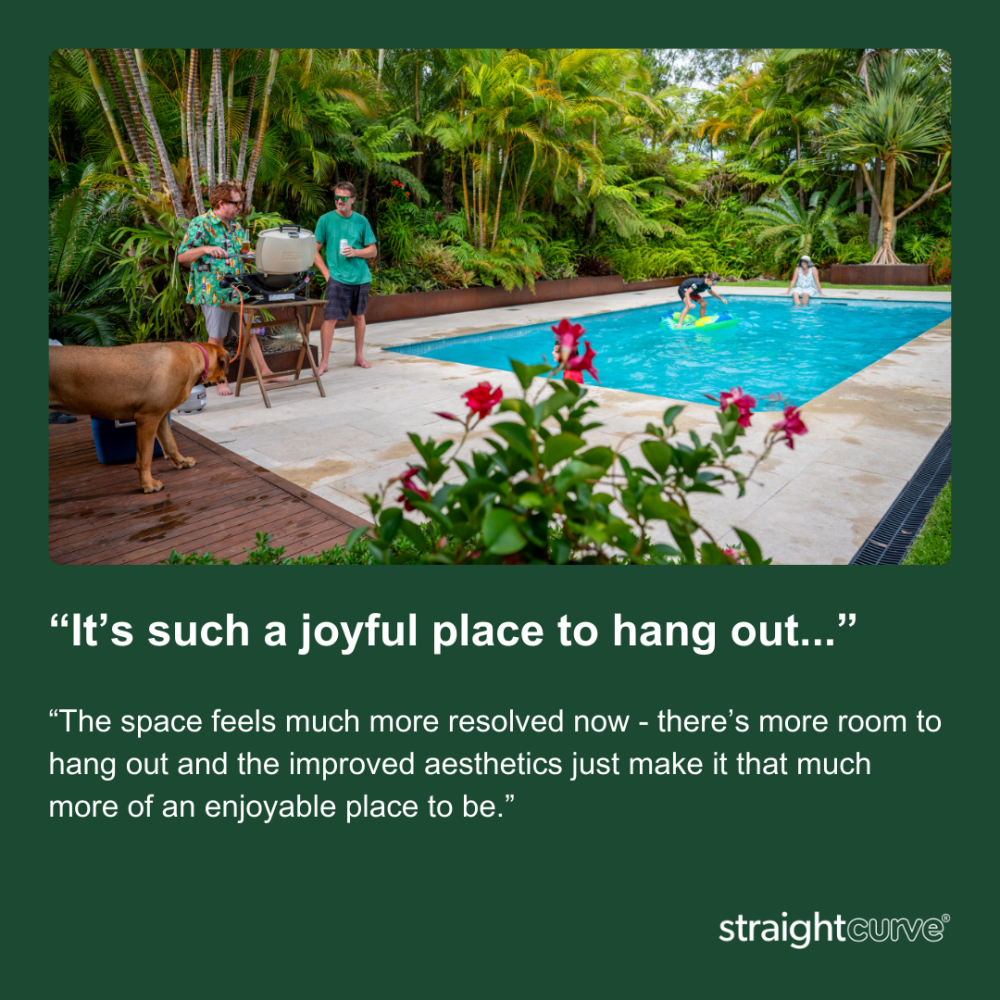
“I look out at the pool area from my home office window and it gives me joy every day. I love the updated colour scheme and aesthetics. The space feels much more resolved now. That’s something I really appreciate when spending time there with my partner and when we have friends over to visit. There’s a lot more usable space now. The planter panels give me a place to perch with my morning coffee or a weekend beer. There are no more mouldy bricks or slippery pool tiles. And finally, whilst it wasn’t the driver behind the renovation, it has added significant value to our property. We had the place valued recently and we reckon the swimming pool landscaping renovation has added between $60-80K to the value of our property. So, in many ways, it’s been a massive value add to our lives.”
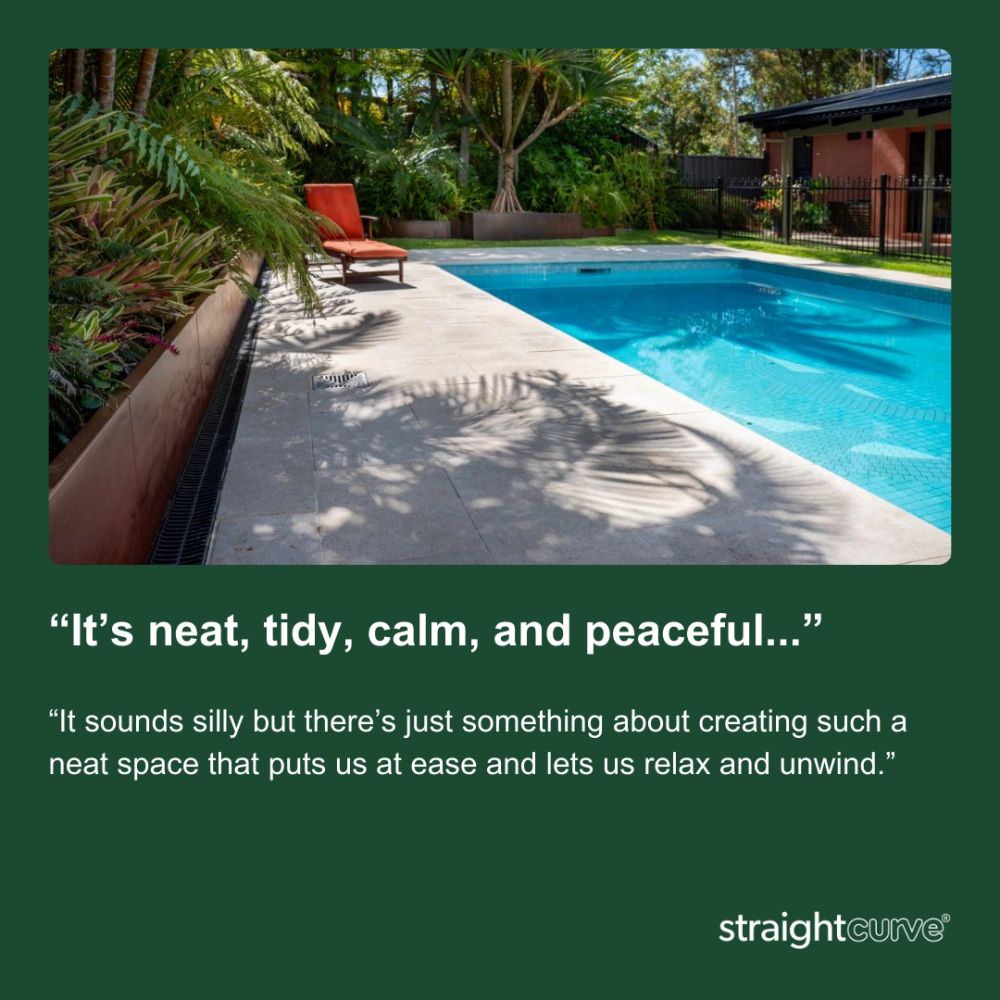
Finally, what does the result of this swimming pool landscaping project mean to you?
“It means that we really love and appreciate our backyard. To us, it’s like an oasis that we’ve created around the swimming pool. And it’s also very low maintenance. That’s important because it’s all well and good to build something beautiful, but it’s a pain if you have to maintain it every day.”
Swimming Pool Landscaping – Straightcurve Steel Raised Garden Beds
Conclusion & Resources:
I hope this case study article has given you valuable insights into using Weathering Steel raised garden bed panels as part of a Swimming Pool Landscaping project. If you’d like to do more research on Steel Raised Garden Beds, check out our Essential Guide to Raised Garden Beds.
If you want to know more about our galvanised or weathering steel raised garden beds, check out these links:
- Download Our Product Catalogue – Download the pdf and skip to the Raised Garden Bed section.
- Check Out Our Image Gallery – Here you’ll find examples of raised garden beds created using our products.
- Introduction Video – Watch this video to see which style of product might work for your project.
- View Installation Videos – Here you’ll discover how easy it is to build raised garden beds yourself.
- Find Your Nearest Dealers – Find stockist locations and contact details on our “Where To Buy” map.
- Request Pricelist & Brochure – Submit to receive a brochure, pricelist, and stockist’s details by email.
Latest Posts
-
 Corten Steel Edging: A Quick Guide to Weathering Steel for Your Garden
15 March 2026
Corten Steel Edging: A Quick Guide to Weathering Steel for Your Garden
15 March 2026
-
Garden Bed Edging Ideas: What Works, What Lasts, and What’s Worth
15 March 2026
-
Celebrating 10 years of Straightcurve at MIFGS
9 June 2025
-
Garden Edging Ideas: A Guide to Better Garden Design
25 February 2025
-
26 Modern Australian Front Yard Ideas to Transform Your Space
31 January 2025