- 01 What is a self-wicking garden bed, and why build one in the UK?
- 02 Tip 1: Choosing the right framework for your wicking bed
- 03 Steel planters make excellent wicking bed frameworks
- 04 Tip 2: Protecting your water reservoir
- 05 Tip 3: The best wicking materials to use
- 06 Tip 4: Wick exchange, the layer most people get wrong
- 07 Don't smooth: leave the surface uneven
- 08 Tip 5: Planting and watering your wicking bed
- 09 Common questions about DIY self-wicking garden beds
What is a self-wicking garden bed, and why build one in the UK?
A self-wicking garden bed (also called a wicking bed) is a raised bed with a sealed water reservoir built into its base. Instead of watering from above, the bed draws moisture upward through the growing medium by capillary action, bringing water directly to the root zone, where plants need it most. You fill the reservoir through an overflow pipe, and the bed does the rest.
It sounds clever because it is. But a DIY self-wicking garden bed is also genuinely straightforward to build once you understand the five things that actually determine whether it works.
There’s no shortage of how-to videos online covering the basics of wicking bed construction. What those videos often skip is the reasoning behind each step, and that’s what makes the difference between a wicking bed that thrives for years and one that stagnates, leaks, or just doesn’t wick properly.
For UK gardeners, a wicking bed has a particular advantage. Our climate delivers plenty of rain across most of the year, but summer dry spells are becoming more common and more unpredictable. A wicking bed buffers against both: the reservoir prevents drought stress during dry periods, while the controlled watering system prevents overwatering during wetter weeks. It’s a smarter way to grow vegetables and herbs year-round.
Quick Summary
A DIY self-wicking garden bed uses a built-in water reservoir and capillary action to deliver moisture directly to plant roots. Building one well comes down to five things: the right framework, a durable and watertight reservoir, an appropriate wicking layer, the correct layering technique, and a sensible watering rhythm. Get these right and a wicking bed can be one of the most productive and low-maintenance growing systems in your garden.
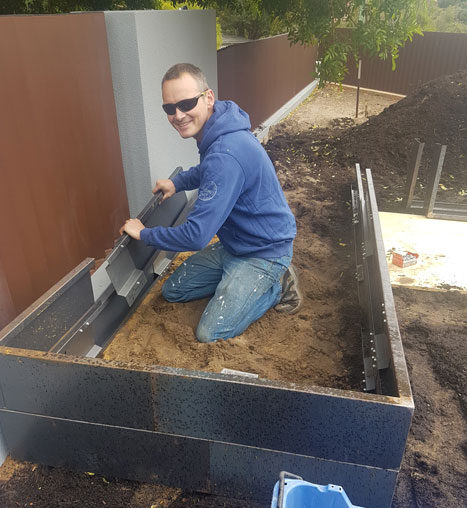
Tip 1: Choosing the right framework for your wicking bed
The housing for your wicking bed can be made from almost anything, a large plastic tub, a steel planter box, a brick-built bed, a timber box, or any other solid container. What matters is that the framework is sturdy enough to hold its shape for the long term and can accommodate a sealed liner without gaps.
A well-built wicking garden bed can last a decade or more, so it’s worth choosing materials that will go the distance:
- Durability first. Whatever you use needs to hold its shape and resist the constant moisture of an in-built reservoir. Timber can work but will eventually rot; steel is a much longer-lasting option.
- No gaps in the walls. If you’re using a soft plastic liner for your reservoir, any gap in the framework wall creates a weak point. The liner needs full support around its perimeter.
- Size matters for usability. Aim for a bed you can reach across comfortably without stepping into it — around 60–90cm wide is the sweet spot for most people.
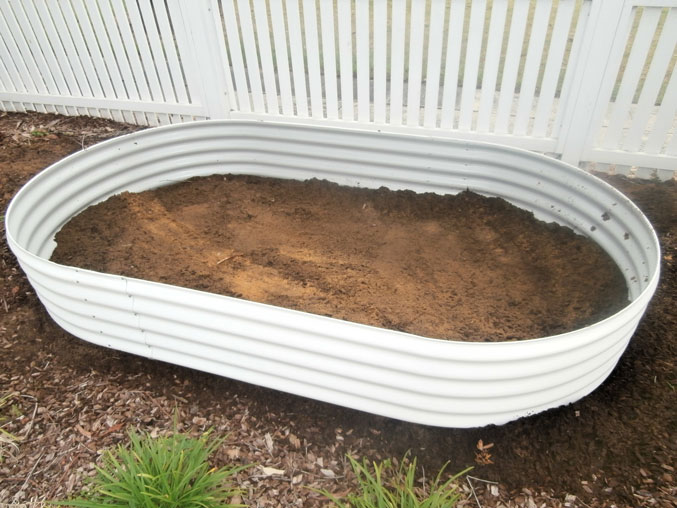
Pro Tip
Steel planters make excellent wicking bed frameworks
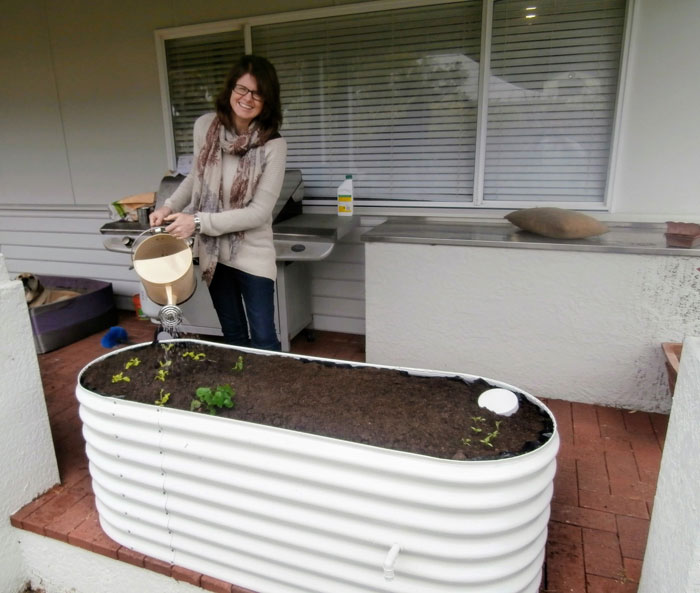
Straightcurve steel planter boxes are particularly well-suited to wicking bed construction, the solid steel walls provide full liner support, the depth is right for a reservoir layer plus growing medium, and the material will outlast timber alternatives many times over. If you’re building a wicking bed from scratch, it’s worth considering a purpose-built steel enclosure rather than repurposing a container.
Tip 2: Protecting your water reservoir
One useful way to think about a wicking garden bed is that you’ve brought the water table up to the base of your growing medium. Capillary action then draws that moisture upward evenly, and plant roots grow downward to meet it. For this to work reliably, the reservoir must be properly sealed and durable.
A few critical points:
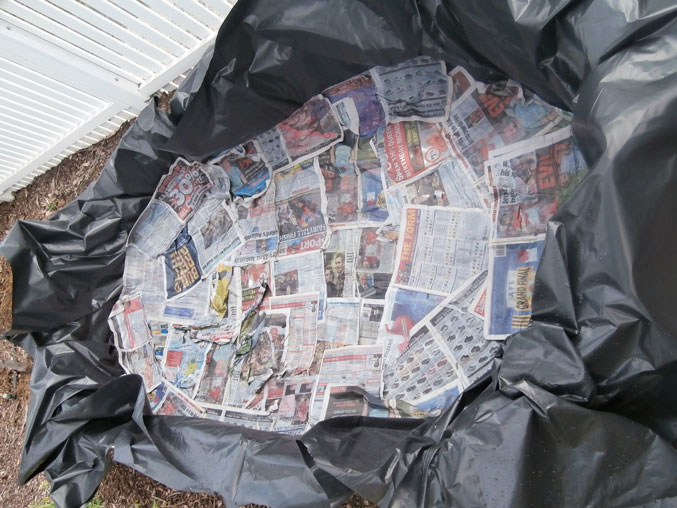
- Use robust liner material. If using heavy-duty builder’s plastic, use two layers. Better still, use a quality pond liner — it’s designed for permanent water contact and will last far longer. Before adding your wicking materials, line the inside with layered wet newspaper for extra protection.
- Check all fittings carefully. If you’re using a preformed plastic reservoir, test it for leaks before filling, especially around the overflow pipe fitting. A slow leak defeats the purpose of the system.
- Watch out for neighbouring roots. The reservoir you’ve created is a permanent water source, and tree or shrub roots nearby will find it. If you’re positioning your wicking bed near established planting, keep this in mind — roots infiltrating the reservoir cause problems that are difficult to fix after the fact.
Tip 3: The best wicking materials to use
The wicking layer sits between your liner and your growing medium. Its job is to hold water in its gaps and allow that water to migrate upward by capillary action. There’s more flexibility here than most guides suggest:
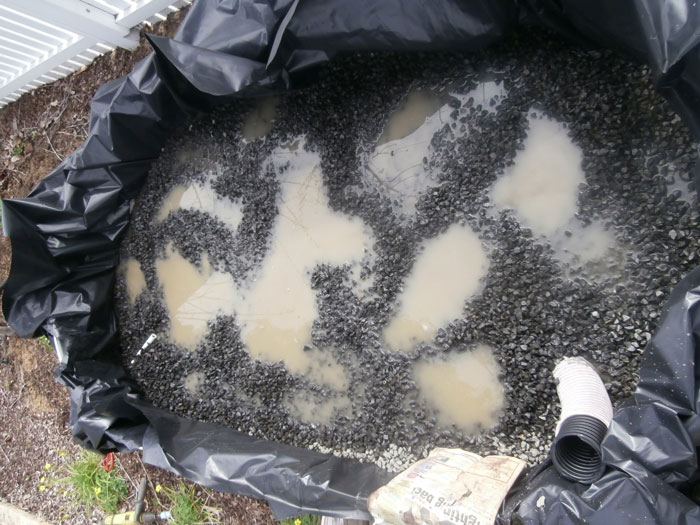
- Lightweight volcanic stone or pumice — an excellent choice where weight is a concern, particularly for balconies or raised decking. Widely available from garden centres.
- Gravel, hardcore, or broken brick — works well and is often freely available if you’re doing any garden tidying. The irregular shapes create plenty of water-holding spaces.
- Geotextile off-cuts, old terracotta pot fragments, and similar materials — these can be tucked in amongst stone to encourage stronger wicking contact between layers. Worth using what you have before buying anything new.
The key property you’re looking for in any wicking material is void space — lots of small gaps where water can sit and from which it can migrate upward. Dense, compacted materials won’t wick effectively.
Tip 4: Wick exchange, the layer most people get wrong
This is the step that most people rush, and it makes a significant difference to how well the bed actually performs.
Before placing your weed-suppressing membrane or geotextile fabric over the wicking layer (this layer keeps your growing medium out of the reservoir while allowing water to pass through), resist the temptation to level the wicking materials off flat. Leave the surface uneven, with dips and undulations.
Why? Those low points allow your compost to nose down into the wicking layer, creating multiple contact points where moisture can transfer from the reservoir into the growing medium. Think of it as creating wicking hotspots throughout the bed rather than relying on a single flat interface.
A few additional points on depth:
- The wicking effect works across roughly 20–25cm. Water moves from wet to dry growing medium across that distance — there’s no benefit to a deeper growing medium beyond that.
- Aim for a compost depth of around 30cm. The overflow pipe should be positioned to create a water table just below the base of the growing medium, typically with the wicking layer being at least 15cm deep.
- An adjustable overflow pipe (using an elbow fitting and a short length of plastic pipe) allows you to fine-tune the water table height depending on the season and what you’re growing. Summer crops with high moisture needs can have a higher water table; crops that prefer drier conditions can have a lower one.
Pro Tip
Don't smooth: leave the surface uneven
The natural instinct is to create a neat, level surface before laying the membrane. Don’t. Those dips and bumps create the contact points that make the wicking system work efficiently. A deliberately rough surface performs better than a tidy one.
Tip 5: Planting and watering your wicking bed
A wicking garden bed is in many ways a living system, and it rewards a particular approach to watering, one that’s quite different from conventional raised bed gardening.
- Water in intervals, not continuously. The aim is to allow the reservoir to draw down and refill rather than keeping it constantly topped up. Permanently saturated conditions create anaerobic soil, waterlogged, low in oxygen, and unfavourable for most plants. Allowing the reservoir to empty periodically encourages roots to reach downward in search of moisture, which builds stronger, more productive plants.
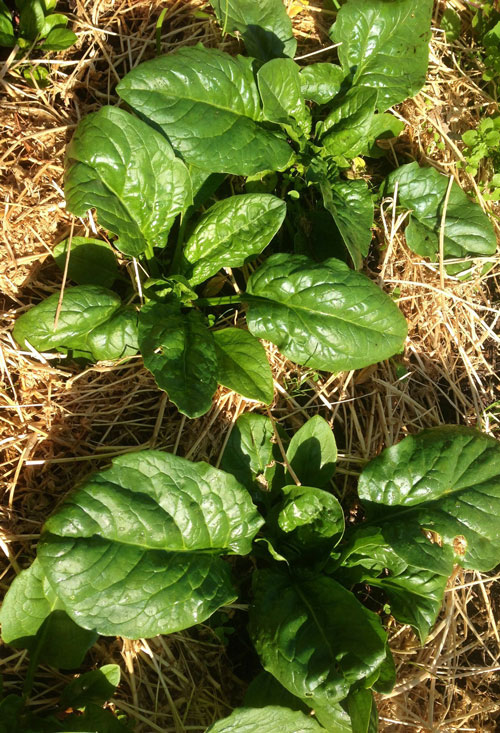
- Planting depth makes a difference. Shallow-rooted or moisture-loving vegetables (spinach, lettuce, celery) can be planted slightly deeper than usual to give their roots a head start in reaching the wicking zone.
- Mulch the surface. Wicking beds can dry out across the top layer of growing medium during summer, even while the reservoir below remains active. A generous layer of mulch on the surface helps retain moisture in the upper zone, protects seedling roots, and insulates the soil biology. This is especially worth doing in summer (June–August in the UK) when evaporation rates are highest.
- Start with a little water from above. When you first plant up a new wicking bed, water lightly from the top for the first week or two. This encourages roots to establish in the upper growing medium before they begin reaching down toward the reservoir. Once established, switch to reservoir-only watering.
Common questions about DIY self-wicking garden beds
What is a self-wicking garden bed?
A self-wicking garden bed is a raised growing container with a sealed water reservoir built into its base. The growing medium sits above the reservoir and draws water upward by capillary action, delivering moisture directly to plant roots without surface watering. You refill the reservoir through an overflow pipe. The system reduces how often you need to water and prevents both drought stress and overwatering.
What can I grow in a wicking bed?
Wicking beds are particularly well-suited to vegetables with consistent moisture needs, tomatoes, courgettes, cucumbers, lettuce, spinach, celery, and herbs like basil and parsley all do well. Root vegetables can be grown in wicking beds but need adequate depth (at least 30cm of growing medium) and a slightly lower water table to avoid waterlogging. Most annual vegetables and many herbs are good candidates.
How deep does a wicking bed need to be?
The capillary action in a wicking bed works effectively across roughly 20–25cm of growing medium. A total bed depth of around 45–50cm (allowing for a 15cm wicking layer plus 30cm of compost) is a practical target. Deeper beds don’t improve wicking performance but do give root crops more room to develop.
How often do I need to refill the reservoir?
This varies with the season, what you’re growing, and how much rainfall you receive. In UK summers, a well-planted wicking bed may need refilling every 3–7 days during dry spells. In spring and autumn, rainfall often does much of the work. The key is to let the reservoir draw down before refilling, don’t top it up continuously.
What's the best material to use as the framework for a wicking bed?
Steel is the most durable and practical option for a long-term wicking bed. It provides solid wall support for the liner, handles constant moisture well, and will outlast timber alternatives significantly. Straightcurve steel planter boxes are well-suited to wicking bed construction, the dimensions work well for the reservoir-plus-growing-medium system.