Garden Bed Edging Ideas: What Works, What Lasts, and What’s Worth
Your garden beds might have great plants in them. But if the edge is messy, the whole area looks messy. That’s what edging fixes. It gives the garden a clean line, and it stops mulch, soil, and grass from slowly mixing into one annoying border.
So what type of edging should you use? Does the material actually matter? And is it a proper DIY job, or one of those things that looks simple until you’re halfway through and cursing at uneven lines?
Let’s keep it practical.
What is Garden Bed Edging, and Why Does It Matter?
Garden bed edging is the boundary between your garden bed and whatever’s next to it, usually lawn, gravel, paving, or a path. It can be a cut trench, brick, timber, stone, or steel garden edging. The point is the same: it tells the garden where to stop.
Without a clear edge, mulch washes out, grass creeps in, and beds lose their shape after rain or mowing. That’s why “before and after” garden makeovers almost always start with a sharper border. If you want inspiration that ties edging into overall layout (not just materials), this guide on garden edging ideas is a good place to start.
If you’re stuck choosing between materials and you want an honest comparison on what tends to hold up over time, read the best garden bed edging.
If you’re at the point where you want to price it properly, you can request a pricelist.
3 Benefits of Proper Garden Bed Edging
1. Stops grass and weeds invading your beds
Grass doesn’t respect boundaries. It just expands. A clean edge won’t make your garden weed-free, but it does slow down the creep and makes it obvious where the lawn ends and the bed starts. That alone saves time because you deal with runners earlier instead of pulling grass out of mulch for months.
If you’ve got aggressive lawn varieties, edging stops the “slow takeover” that happens around the borders first.
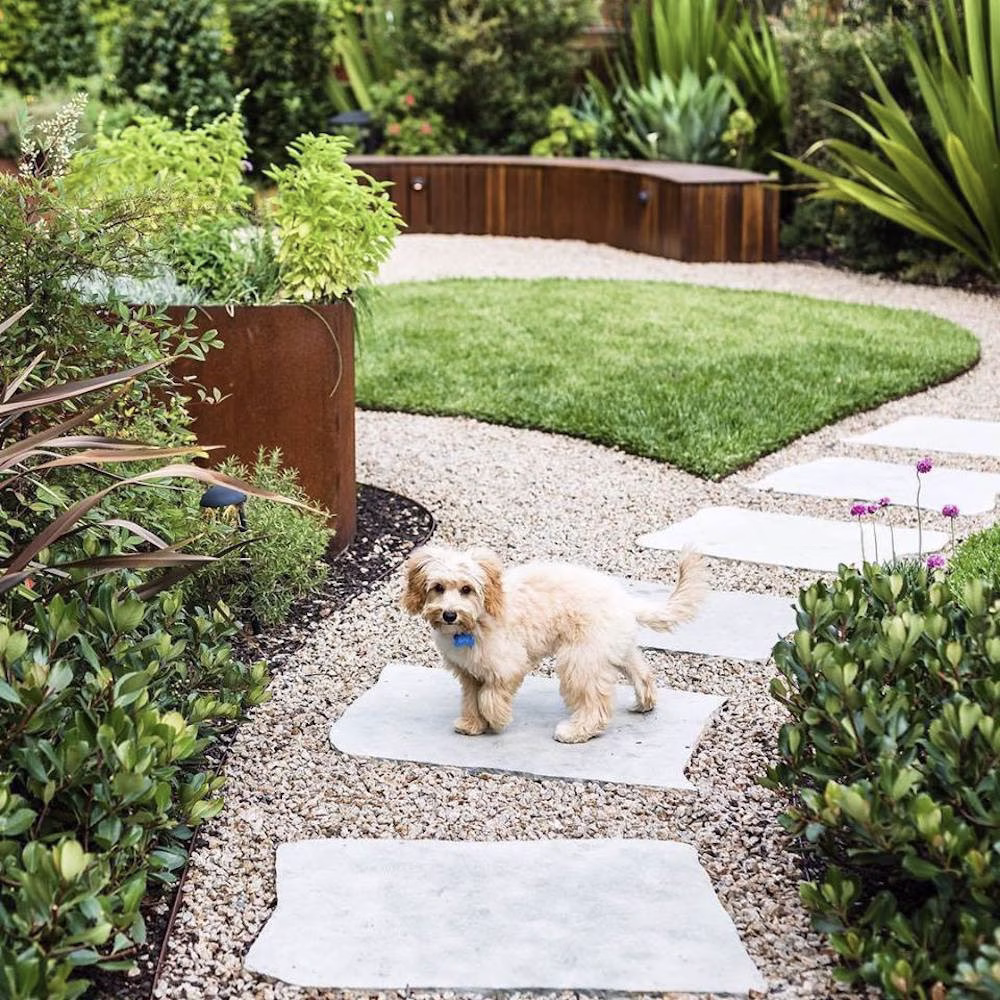
2. Makes your whole garden look more intentional
You can have a simple planting plan and still make it look good if the outline is clean. Edging does that. It’s the frame around the picture.
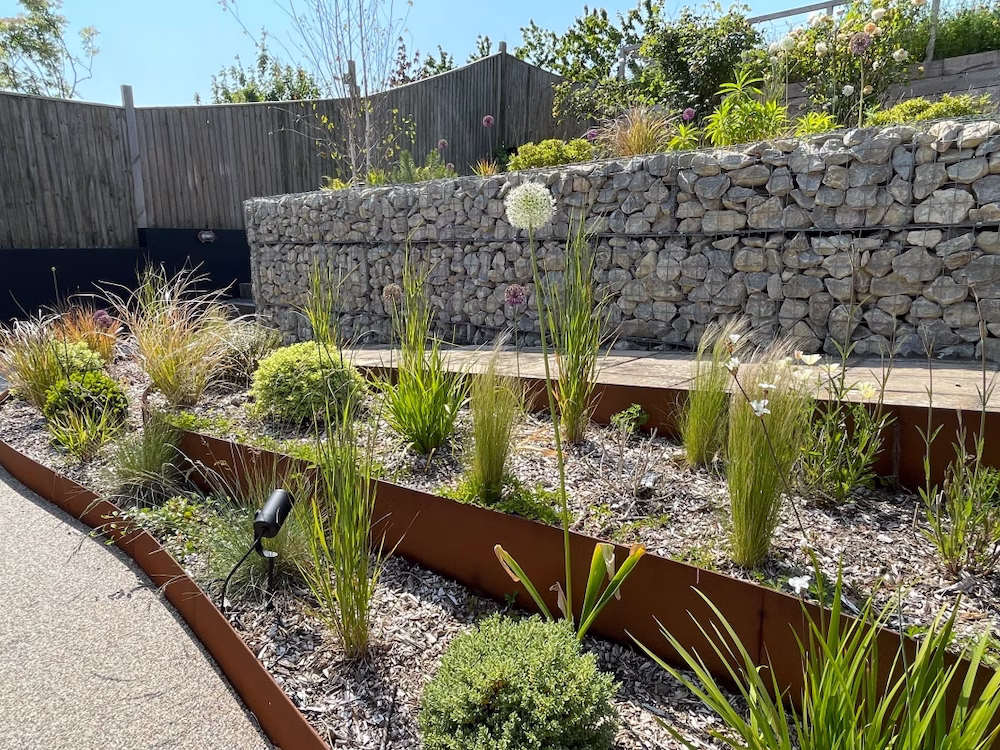
If you’re into the rusted steel look you see in modern gardens, that’s usually weathering steel. It develops a protective patina over time. This explainer on weathering steel edging is worth reading before you commit, because the finish changes as it ages.
3. Reduces ongoing maintenance
A proper edge means less fixing. Less mulch spilling onto paths, less line trimming around fuzzy borders, less re-cutting. It’s not glamorous, but it’s the kind of upgrade you notice every weekend because the garden stays tidier with less effort.

DIY Garden Bed Edging: What You Need to Know
DIY edging can look great. The problem is that most DIY edging fails for predictable reasons. The line wasn’t marked properly, the base wasn’t compacted, the depth was inconsistent, or the material wasn’t right for the conditions. It’s rarely “bad luck”.
If you want a strong overview of edging basics before you start, the garden edging essential guide is a solid reference.
Tools and Materials for a DIY Edge for Lawn
You don’t need fancy tools. A few basic tools are enough to keep the edge consistent.
- Spade or trenching shovel
- String line and pegs (or marking paint)
- Tape measure
- Rubber mallet
- Gloves and eye protection
- Small level
- Rake and broom
- Your edging material and the correct fixings
If your plan includes raised garden edging ideas (where the edge also holds soil back), the build needs more thought than a flush edge. This guide on DIY raised garden beds covers the durability side of it.
Step-by-Step Guide for DIY Garden Bed Edging
- Plan and mark your line – Use a string line for straight runs. For curves, use a hose or rope so you can tweak it easily. Then step back and look at it from where you’ll actually see it, like the patio or the kitchen window. That view matters more than the close-up view.
- Cut a clean edge – Use a sharp spade and cut straight down, not on an angle. If you’re doing a trench edge, remove a narrow strip of turf and soil to create a clear channel. Keep the width consistent so it doesn’t look lumpy.
- Set depth and prep the base – This is where people rush and regret it later. If you’re installing a physical edging product, don’t install it on loose soil and hope it settles. Compact the base and keep the depth consistent. A wavy base gives you a wavy edge.
- Install, secure, and finish – Install the edging, fix it properly, backfill on the bed side, and tamp it down. Then tidy the top line so the edge reads cleanly. The finishing is what makes it look “done”.
If you want to see installs step-by-step, the DIY hub for home gardeners is built for that.
If you want pricing and product details, you can request a pricelist.
Professional Garden Bed Edging: Is It Worth It?
Sometimes DIY is the smart choice. Sometimes it’s a false economy. If you’re edging one small bed, go for it. If you’re doing long runs with curves, tying into paving, or building raised borders that need to stay straight and strong, a professional install can save you from ripping it out and doing it twice.
Pros also tend to handle the annoying details better, like smooth curves, consistent levels, clean joins, and corners that don’t spread apart over time.

When to Hire a Professional Landscaper
Large-scale projects or complex designs
Long edges show every mistake. A small kink becomes obvious once you’ve got ten metres of it. If your design has multiple curves or needs to line up with paths and paving, a good installer can keep it consistent.
Raised garden edging ideas that act like retaining walls
Once the edging is holding back soil, it’s not just decorative. It’s doing a job. On slopes, that matters even more. If your project involves terraces, steps, or planter walls built into a slope, this guide on sloping garden ideas is a useful reality check.
Saving time and getting a cleaner finish
Some people don’t want to spend a whole weekend on layout and base prep. Fair. A professional can usually get it done faster, and the finish is often noticeably cleaner because they’ve done it a hundred times.
What to Expect from a Professional Edging Service
Typical costs and services included
Usually you’re paying for layout, excavation or trenching, base prep, installation, and cleanup. If you’re doing raised edging, the scope might also include bracing, drainage considerations, and joining systems. If you’re comparing quotes, compare scope first.
Tips for choosing the right landscaper
You want someone who can explain the process, not just sell you on the result.
- Ask what they do for base prep and compaction.
- Ask how they handle curves and corners.
- Ask how the edge is anchored to prevent movement.
- Ask for photos of edging work specifically.
- If you’re using steel, ask what the finish will look like over time. The corten steel edging guide explains the patina change clearly.
If you’re working through trade or suppliers, Straightcurve also has information for landscape supply retailers.
Common Garden Bed Edging Mistakes and How to Avoid Them
DIY Errors That Can Damage Your Garden
Uneven edges or improper depth
This is the big one. If the depth changes along the run, the finished line looks wavy. If it’s too shallow, it shifts. And once it shifts, you’ll notice it every time you mow.
If you want a straight comparison of which materials tend to behave better long-term, read the steel vs other materials.
Using unsuitable materials
Timber that isn’t rated for ground contact rots quickly. Thin plastic edging pops out. Loose bricks migrate if they’re not set on a stable base. Pick the material based on the conditions, not just the look.
Signs of Poor Professional Installation
Misaligned edges
A good edge reads as one clean line. If you can see little kinks or dips from normal viewing angles, the install wasn’t done carefully enough.
Gaps in the edging material
Gaps are where mulch escapes and grass sneaks through. They also make the job look pieced together. Joins and corners are where standards show, so check those first.
Frequently Asked Questions
What is the easiest garden bed edging for a clean finish?
If you want the fastest method, a trench edge is quick and cheap, but it needs regular re-cutting. If you want a cleaner, longer-lasting line with less ongoing maintenance, a properly installed physical edge is usually the better option. For inspiration across styles, start with these garden edging ideas.
What tools do I need to edge garden beds at home?
A sharp spade, a way to mark your line (string line or paint), and a tape measure will cover the basics. If you’re installing edging material, add a mallet, level, and the right fixings. The DIY page for DIY home gardeners has practical install resources too.
Should I use timber, steel, brick, or concrete for garden bed edging?
It depends on the look you want, how permanent you want it to be, and how much movement you can tolerate over time. Timber is quick and affordable but can rot. Brick and concrete are solid but less flexible for curves. Steel is clean, durable, and handles curves well. The best garden bed edging guide lays out the trade-offs clearly.
How do I maintain garden bed edging so it keeps looking sharp?
Top up mulch so it sits neatly against the bed side of the edge. Trim runners early instead of letting them cross over. After heavy rain, do a quick check for movement or gaps. If you’ve got a trench edge, plan to re-cut it a couple of times a year.
Can I install garden bed edging on a slope?
Yes, but slope is where shortcuts show. You may need stepped sections, stronger anchoring, and sometimes a raised edge that behaves more like retaining. This guide on sloping garden ideas shows what that can look like.
How long does DIY garden bed edging typically take?
A small trench edge can be done in a couple of hours. Installing physical edging usually takes longer because most of the time is in layout and base prep. Longer runs and curves add time quickly.
How do I stop weeds and grass creeping into garden bed edges?
Edging helps, but it doesn’t stop everything by itself. The best combo is a clean edge, good mulch depth, and quick regular trimming along the boundary. If you want a fundamentals refresher, the garden edging essential guide is a good reference.
Conclusion
If you want your garden to look sharper with less effort, get the edge right first. Pick an edging approach that matches how you actually garden, not the fantasy version of how you think you’ll garden. Then put the time into prep so the line stays clean.
For more tips and practical reading, start here:
- Explore garden edging ideas.
- Read the best garden bed edging guide.
- Use the DIY raised garden beds guide.
If you want to cost it up properly, you can request a pricelist.
Additional Resources:
If you’re planning a bigger refresh, it helps to sort the design, materials, and installation method before you buy anything. These pages make that easier.
Use these links to keep moving:
Latest Posts
-
 Corten Steel Edging: A Quick Guide to Weathering Steel for Your Garden
15 March 2026
Corten Steel Edging: A Quick Guide to Weathering Steel for Your Garden
15 March 2026
-
Garden Bed Edging Ideas: What Works, What Lasts, and What’s Worth
15 March 2026
-
Celebrating 10 years of Straightcurve at MIFGS
9 June 2025
-
Garden Edging Ideas: A Guide to Better Garden Design
25 February 2025
-
26 Modern Australian Front Yard Ideas to Transform Your Space
31 January 2025